How to configure GitCMS?
-
 Waishnav
 - 02 Feb, 2025
After installing the GitCMS Chrome extension, you can easily configure your static site’s content management system with a visual interface. Let’s walk through the process step by step.
Step 1: Initializing GitCMS Configuration
Navigate to your GitHub repository where you want to manage your static site’s content. Look for the GitCMS icon in your Chrome extension menu and click on it. You’ll see a popup with an “Initialize” button - this is your gateway to setting up GitCMS.
When you click the initialize button, you’ll be redirected to a new file creation page on GitHub with gitcms.md as the filename. Here, you’ll find the GitCMS configuration editor rendered right within GitHub’s interface.
Step 2: Basic Information
The first step in configuration requires two essential pieces of information:
- Website URL: Enter your static site’s URL (e.g., https://yourblog.com)
- Media Folder: Specify the folder where your media files will be stored
Understanding Media Folder Structure
The media folder is crucial for organizing your content assets efficiently. This is public folder usually managed by your static site generator. GitCMS follows a structured approach to media management:
public_media_folder/
  ├── blogs/
  │   ├── blog-post-1/
  │   │   ├── og.png
  │   │   ├── screenshot1.png
  │   │   └── diagram.jpg
  │   └── blog-post-2/
  │   │   ├── og.png
  │       └── cover.png
  └── authors/
      └── waishnav/
          └── profile.jpg
This structure ensures that:
- Each content piece has its dedicated media subfolder
- Media files are organized by collection and content title
- Assets are easily discoverable and manageable
Step 3: Adding Collections
Collections are the heart of your content structure. Each collection represents a group of related content, such as blog posts, pages, or team members.
To add a collection:
- Click the Add Collection button
- Provide a collection name (e.g.,
blog,pages,authors) - Specify the folder path where markdown files for this collection will be stored (e.g.
content/blog)
Step 4: Configuring Frontmatter Schema
The frontmatter schema defines the structure and types of metadata for your content. GitCMS provides various field types to create a rich content editing experience:
Available Field Types:
-
Title Field: For post titles and main headings
title: "My Awesome Post" -
Single Line Field: For short text like descriptions or tags
subtitle: "A brief introduction" -
Multi Line Field: For longer text content
excerpt: | This is a longer description that spans multiple lines -
DateTime: For scheduling and publishing dates
date: 2024-03-15T10:00:00Z -
MultiSelect: For categories, tags, or any grouped attributes
categories: ["Tutorial", "Getting Started"] -
File Input: For media uploads, automatically managed in your media folder
featured_image: "/blog/my-post/cover.jpg" -
Boolean Field: For toggle options like draft status
draft: false
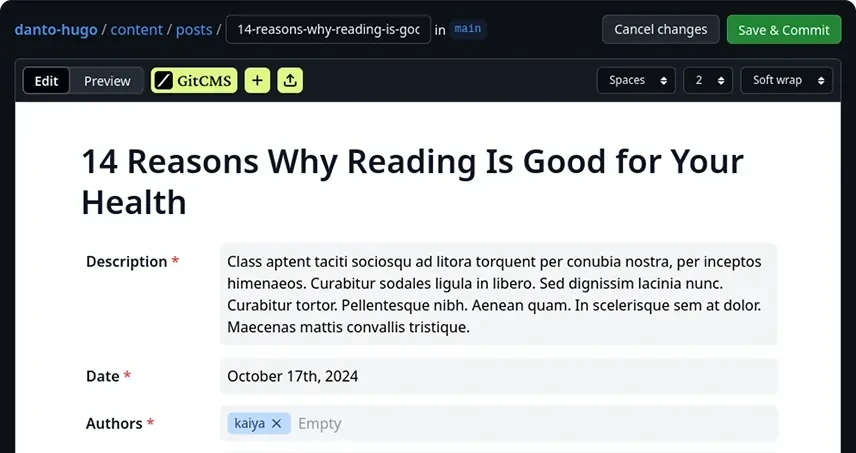
Step 5: Start Creating Content
Once your configuration is complete, you’re ready to create content using GitCMS’s Notion-like editor:
- Navigate to any markdown file in your configured collections
- Click the GitCMS extension icon to toggle the GitHub and GitCMS editor
- Enjoy a rich editing experience with:
- Visual markdown editing
- Structured metadata forms
- Upload media files and preview them in the editor
Next Steps
With your GitCMS configuration in place, you can:
- Create new content using the visual editor
- Manage media assets efficiently
- Collaborate with team members
- Keep your static site’s content organized and maintainable
Stay tuned for our upcoming guides on advanced features like media management, content modeling, and team collaboration workflows!